Deploying a WordPress Instance
Deploying a WordPress Server
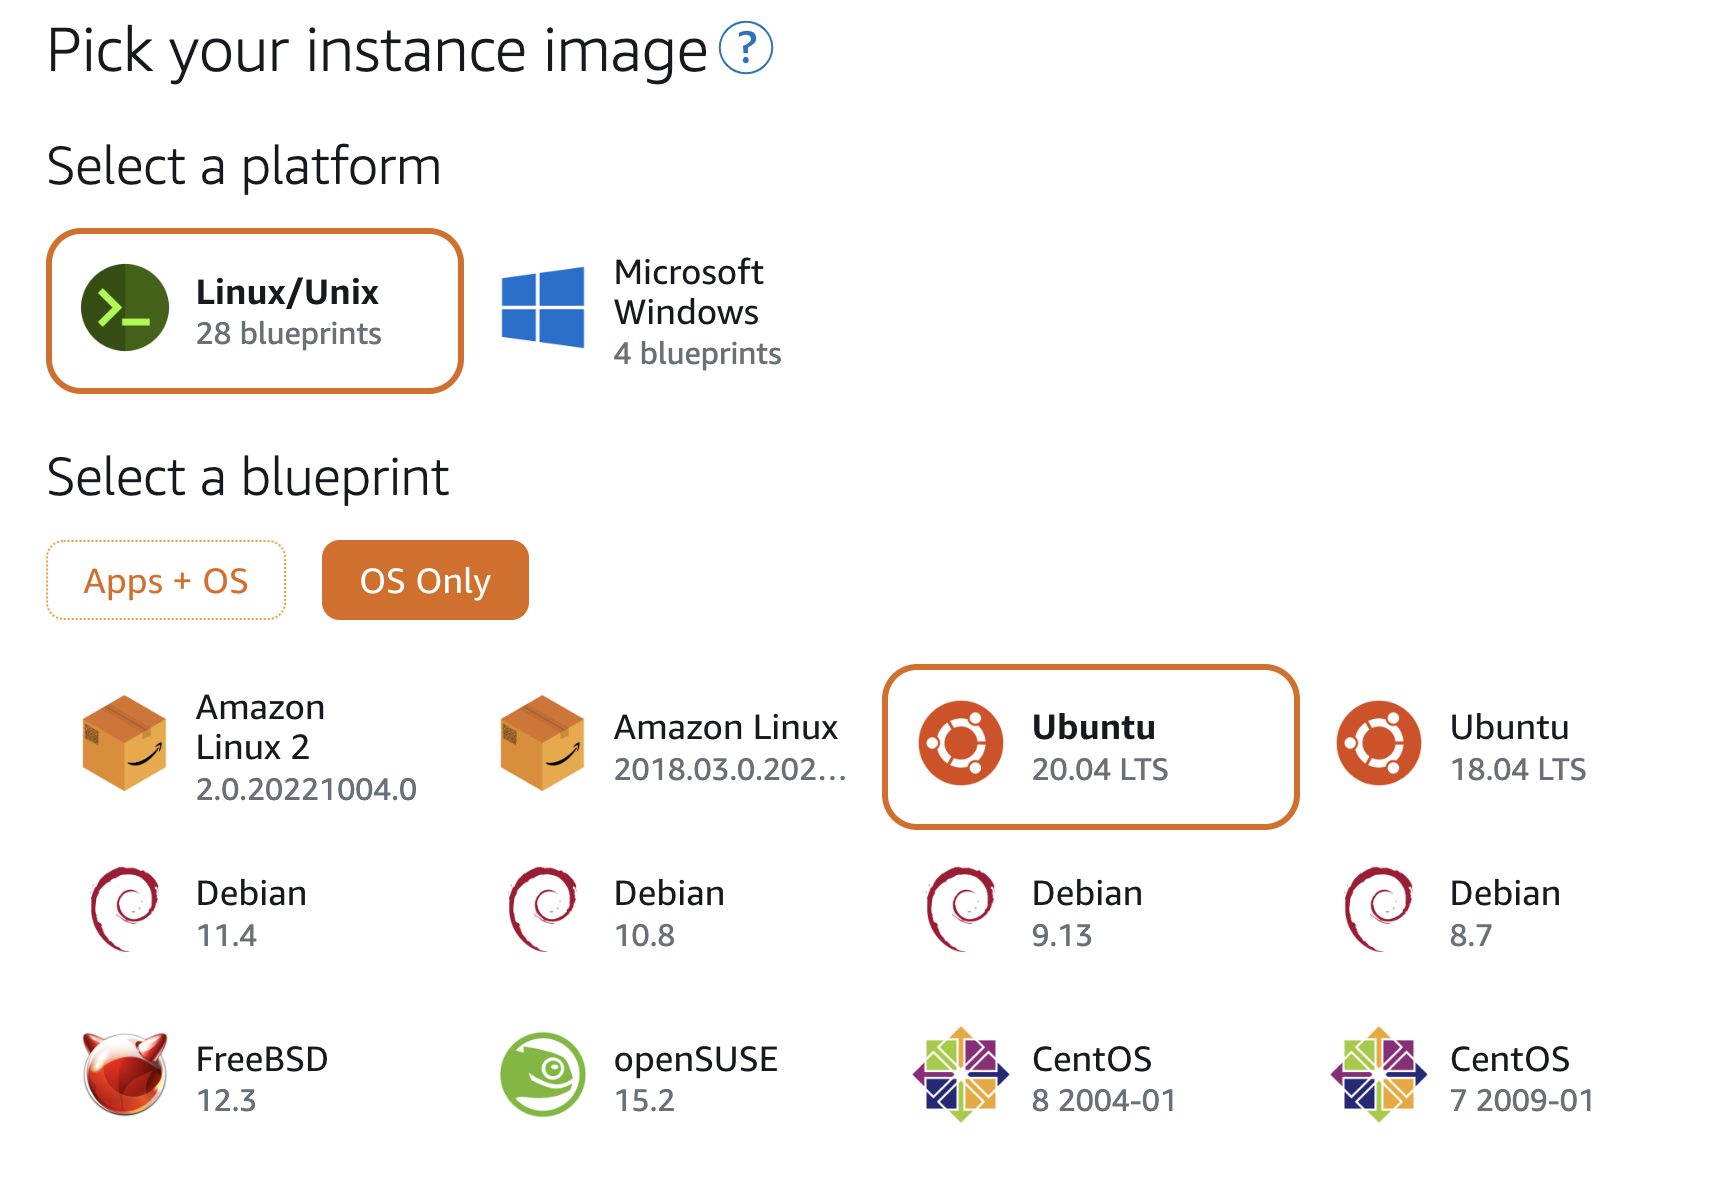
- Choose a blueprint.
- Click on the Home button in the top banner and select Create instance.
- Ensure that the location of the virtual machine (instance) matches the database you’ve recently deployed. If it defaults to a different location or AZ, click “Change AWS Region and Availability Zone” and select the correct value.
- Please select your instance image. Under “Select a blueprint,” click on OS Only and choose Ubuntu 20.04 LTS.
-
Click on “Add launch script.”
- You will use the launch script to install prerequisites, as well as WordPress and WordPress CLI. Paste the following code into the launch script:
# Update the package index
sudo apt update

# Install the common package
sudo apt install software-properties-common -y

# Add the PHP repository to the instance
sudo add-apt-repository ppa:ondrej/php -y

# Update the package index now that the new repository has been added
sudo apt update

# Install Apache, PHP, mysql client
sudo apt-get install apache2 php8.0 libapache2-mod-php8.0 php8.0-common php8.0-imap php8.0-mbstring php8.0-xmlrpc php8.0-soap php8.0-gd php8.0-xml php8.0-intl php8.0-mysql php8.0-cli php8.0-bcmath php8.0-ldap php8.0-zip php8.0-curl mysql-client-core-8.0 -y


# Go to the web folder
cd /var/www/html/

# Download the latest version of WordPress
sudo curl -O https://wordpress.org/latest.tar.gz

# Unzip the files
sudo tar xzvf latest.tar.gz

# Delete the zipped download
sudo rm ./latest.tar.gz

# Move all the WordPress files to the root web directory
cd ./wordpress/ && sudo mv ./* ../

# Create the WordPress Config file from the sample
sudo cp /var/www/html/wp-config-sample.php /var/www/html/wp-config.php

# Change the permissions for the directory
sudo chown -R www-data /var/www

# Remove the sample config file
sudo rm /var/www/html/wp-config-sample.php

# Go back up a level and delete index.html
cd ../
sudo rm ./index.html

# Download WP-CLI
sudo curl -O https://raw.githubusercontent.com/wp-cli/builds/gh-pages/phar/wp-cli.phar

# Make it executable
sudo chmod +x wp-cli.phar

# Move it to the bin directory
sudo mv wp-cli.phar /usr/local/bin/wp

# Create the wp-cli config file that points to our WordPress folder
echo "path: /var/www/html" > $HOME/wp-cli.yml

# Enable the GD PHP extension by removing the ';'
sudo sed -i 's/;extension=gd/extension=gd/' /etc/php/8.0/apache2/php.ini

# Restart the apache service
sudo /etc/init.d/apache2 restart
-
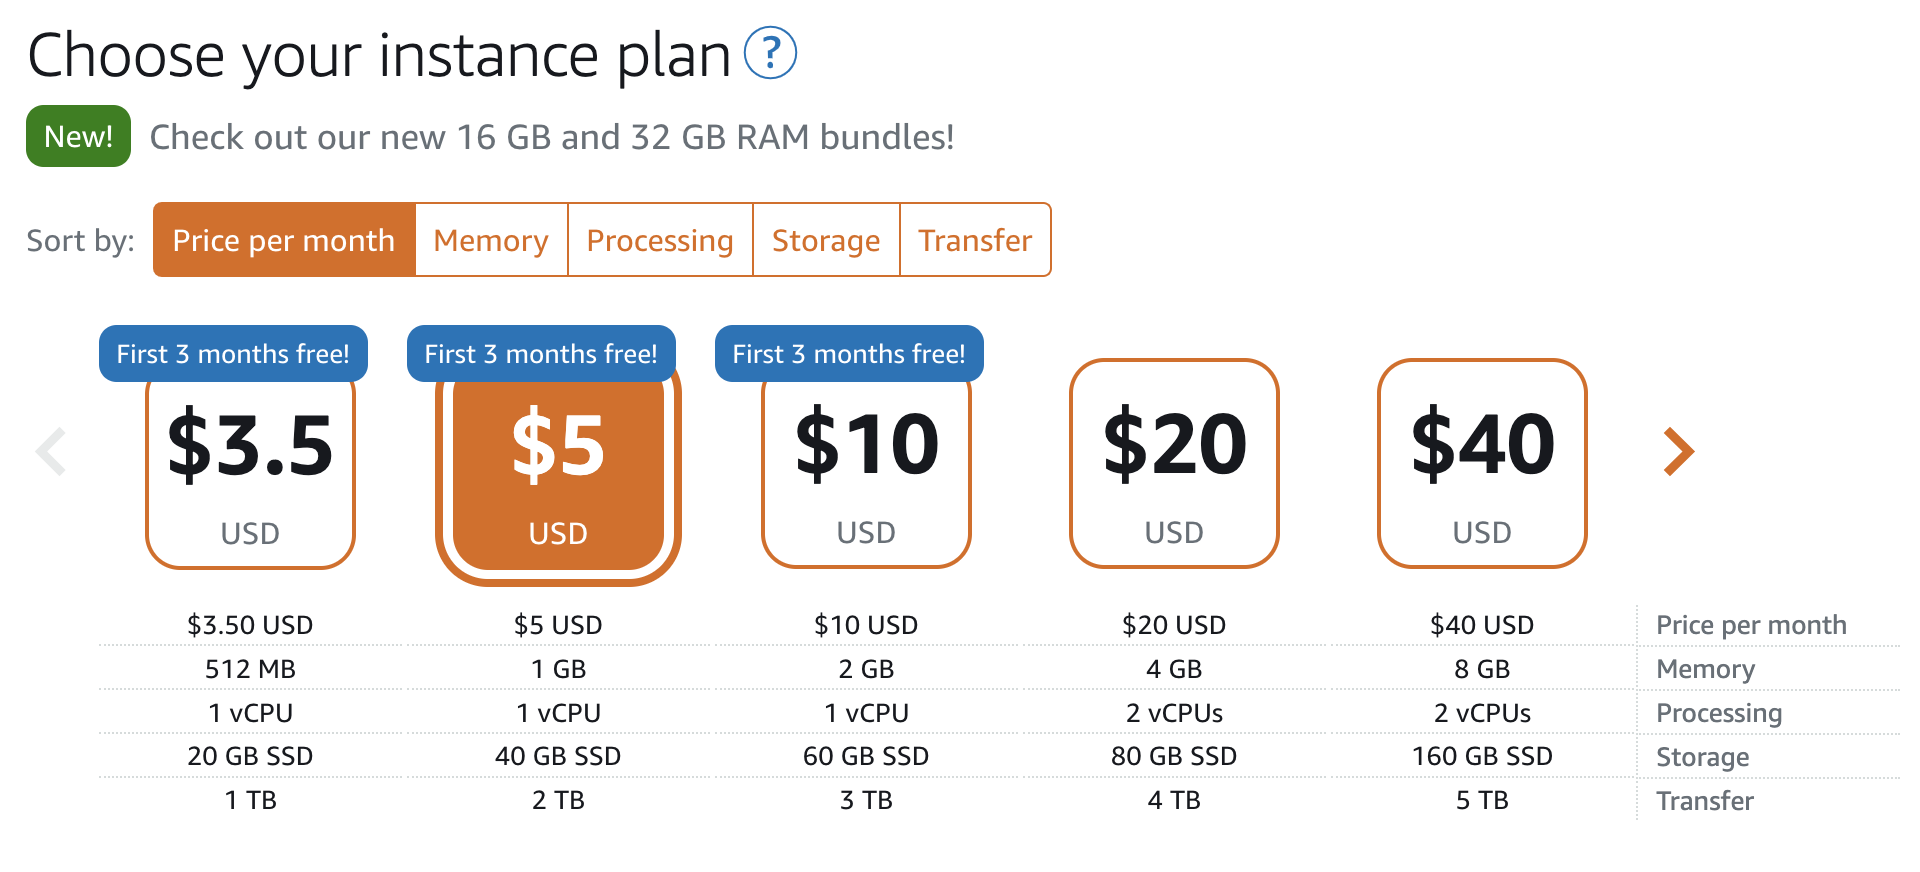
Scroll down to ‘Choose your instance plan.’
- Select the ‘$5 USD’ server with 1GB of memory and 1 vCPU.
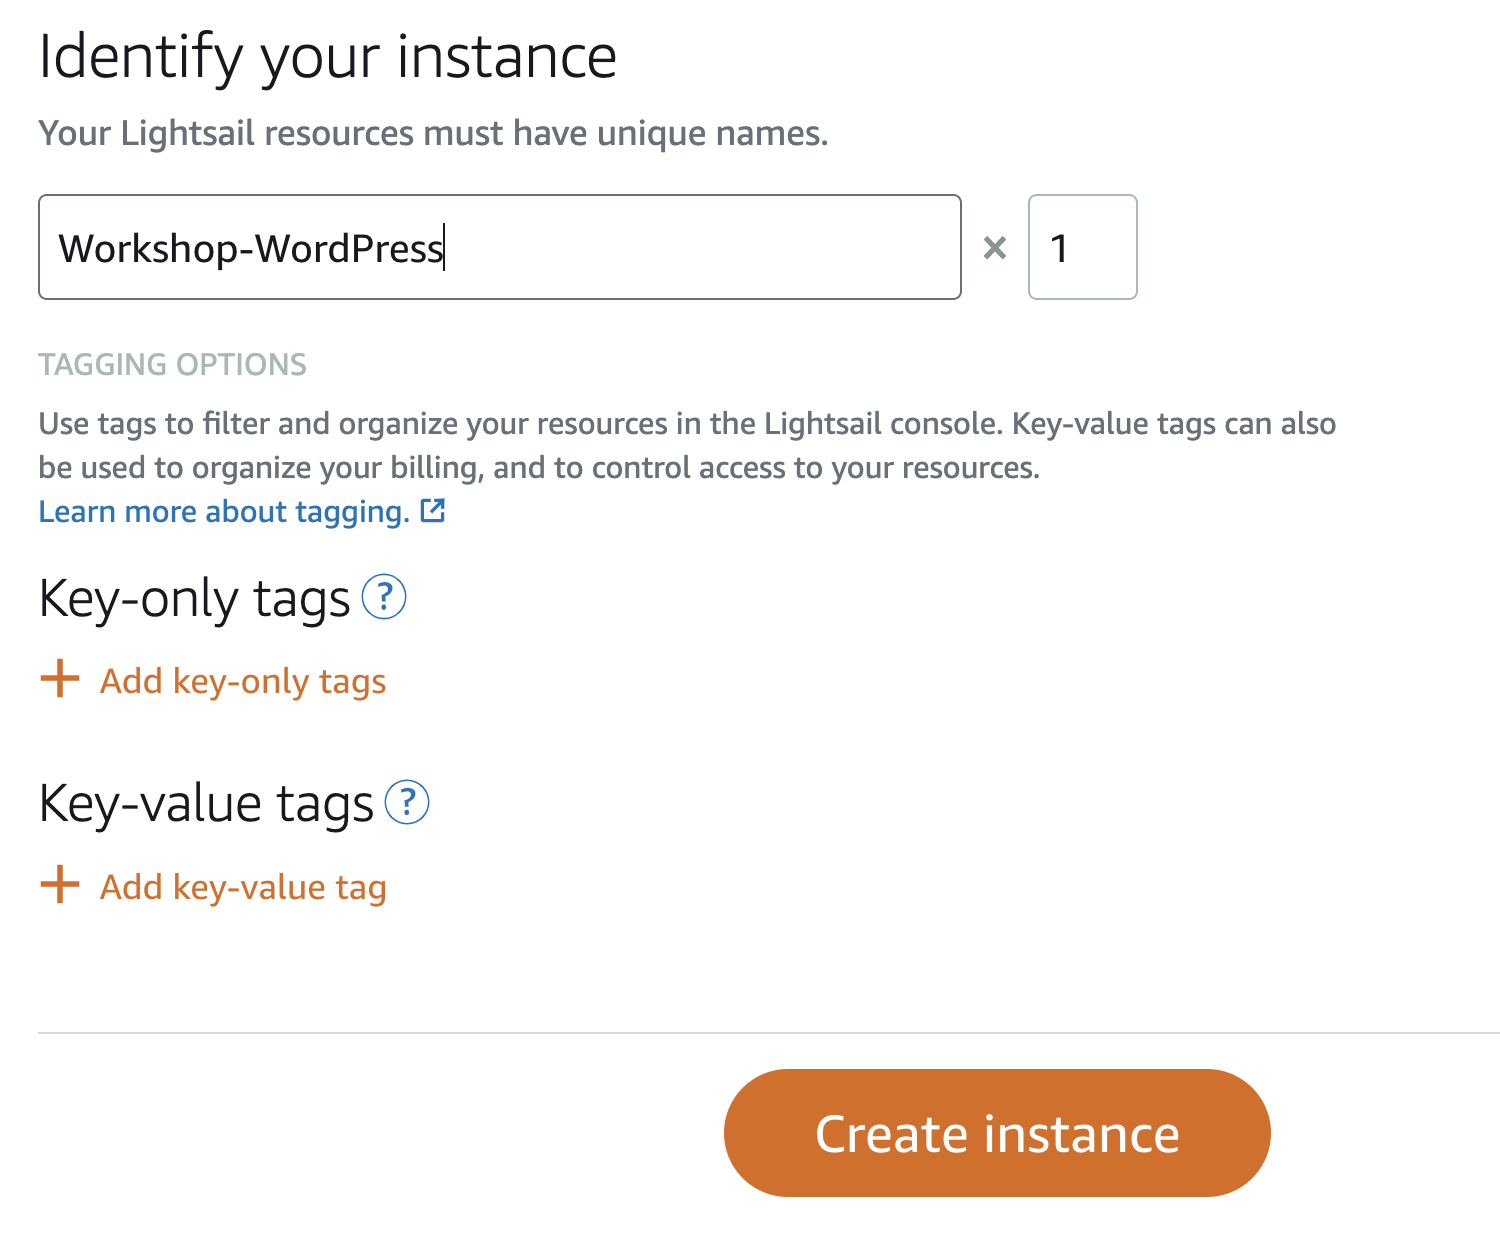
- Define your instance
-
We need to name your virtual machine.
-
Name your instance ‘Workshop-WordPress’.
-
Click Create instance.
-