Deploy a Database on Lightsail
To log in to the AWS control panel, follow these steps:
-
Next to this guide, click on the Amazon Lightsail control panel.
-
Log in with your AWS login information.
-
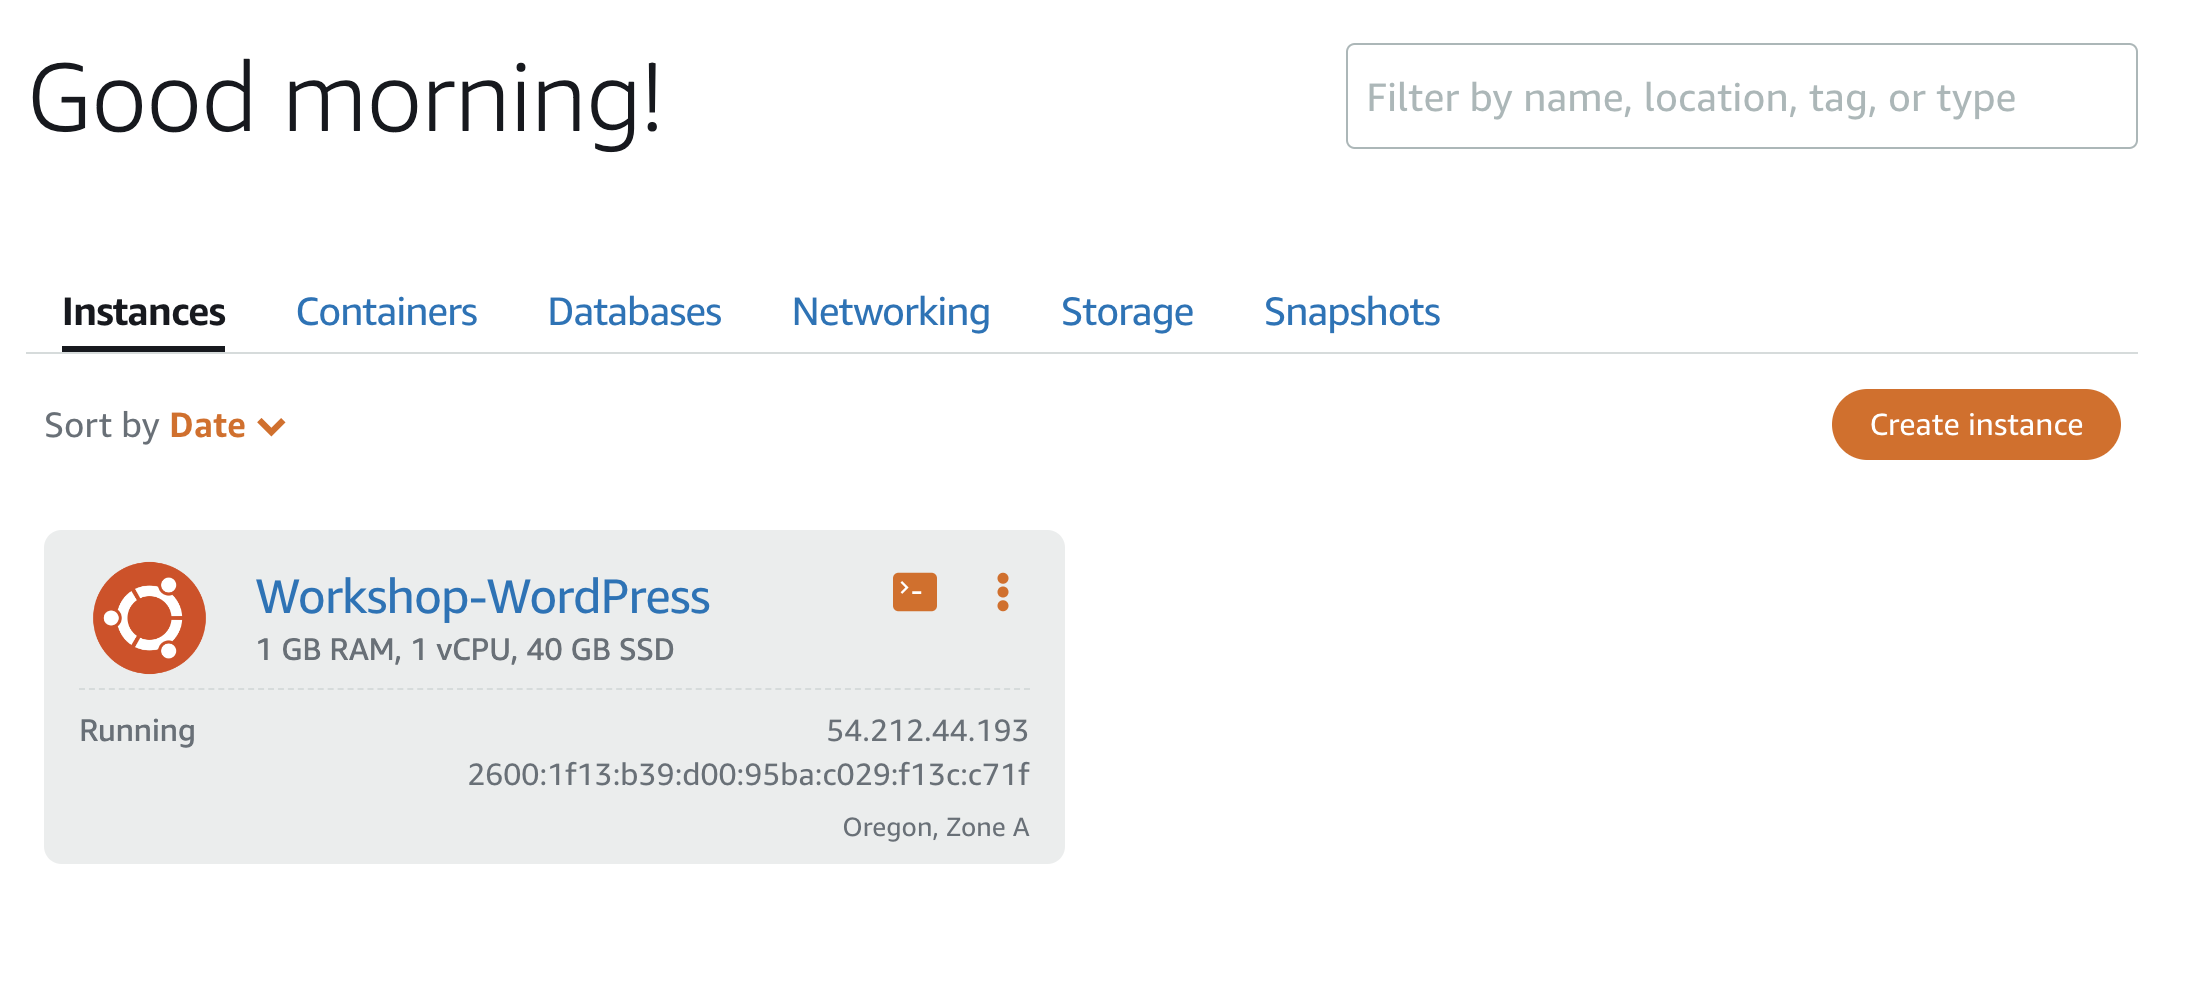
Now you should see the Lightsail control panel.
Deploy a Database on Lightsail
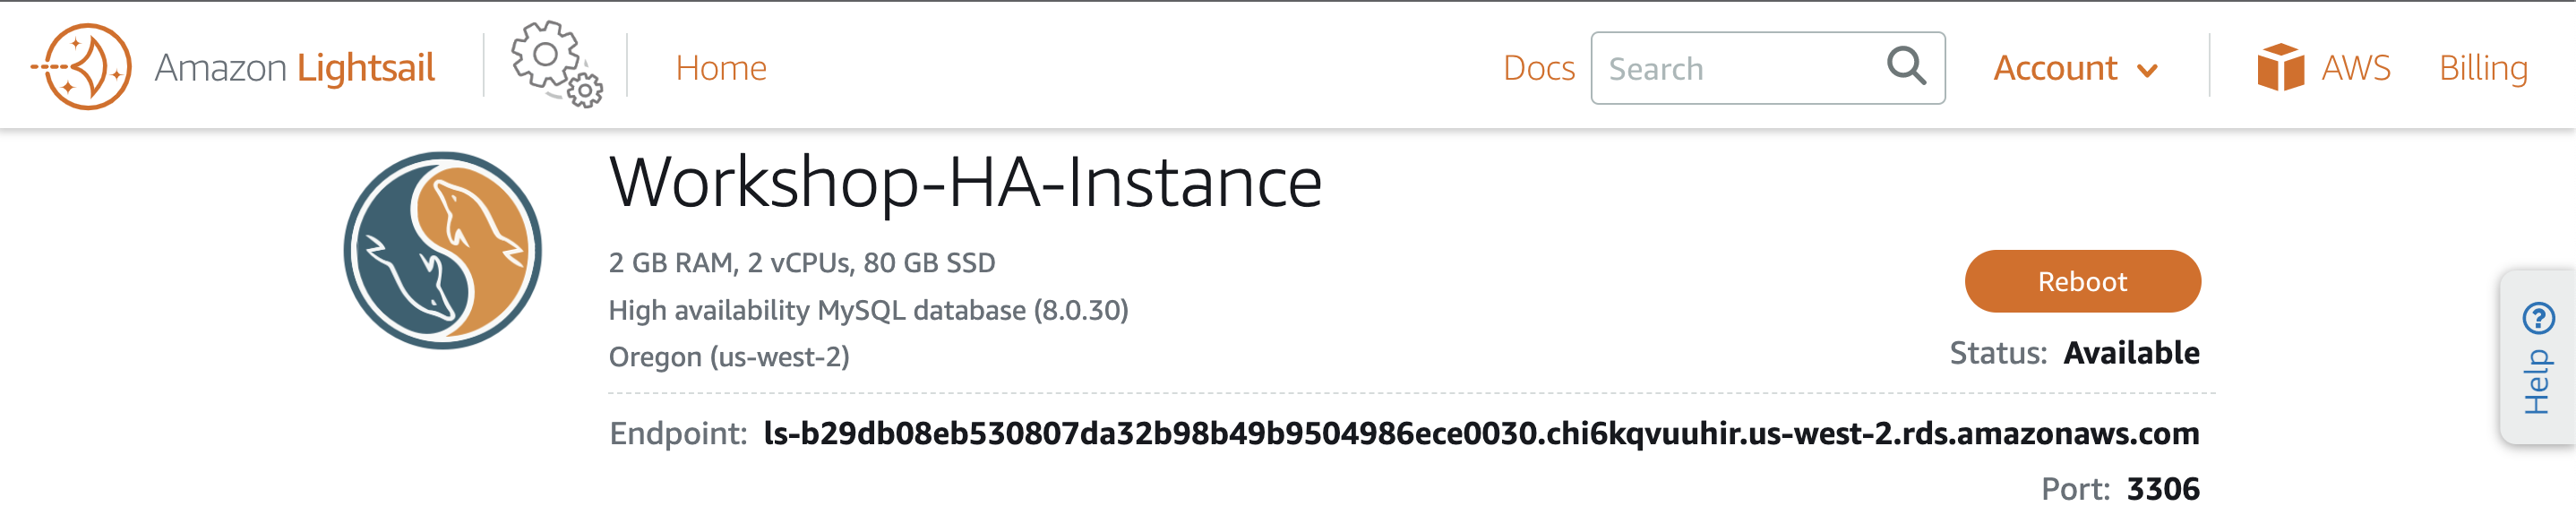
Two of our applications (WordPress and Akaunting) will use the MySQL database. In this section, we will deploy a highly available database, meaning there is an active database and a passive database deployed. Both receive all writes/edits. If the active database encounters any issues, the passive database will automatically be upgraded to the ‘Active’ state, ensuring continuity and availability. We will deploy the database first because this deployment takes 10-15 minutes, and you can proceed with other steps rather than waiting for it to be ready.
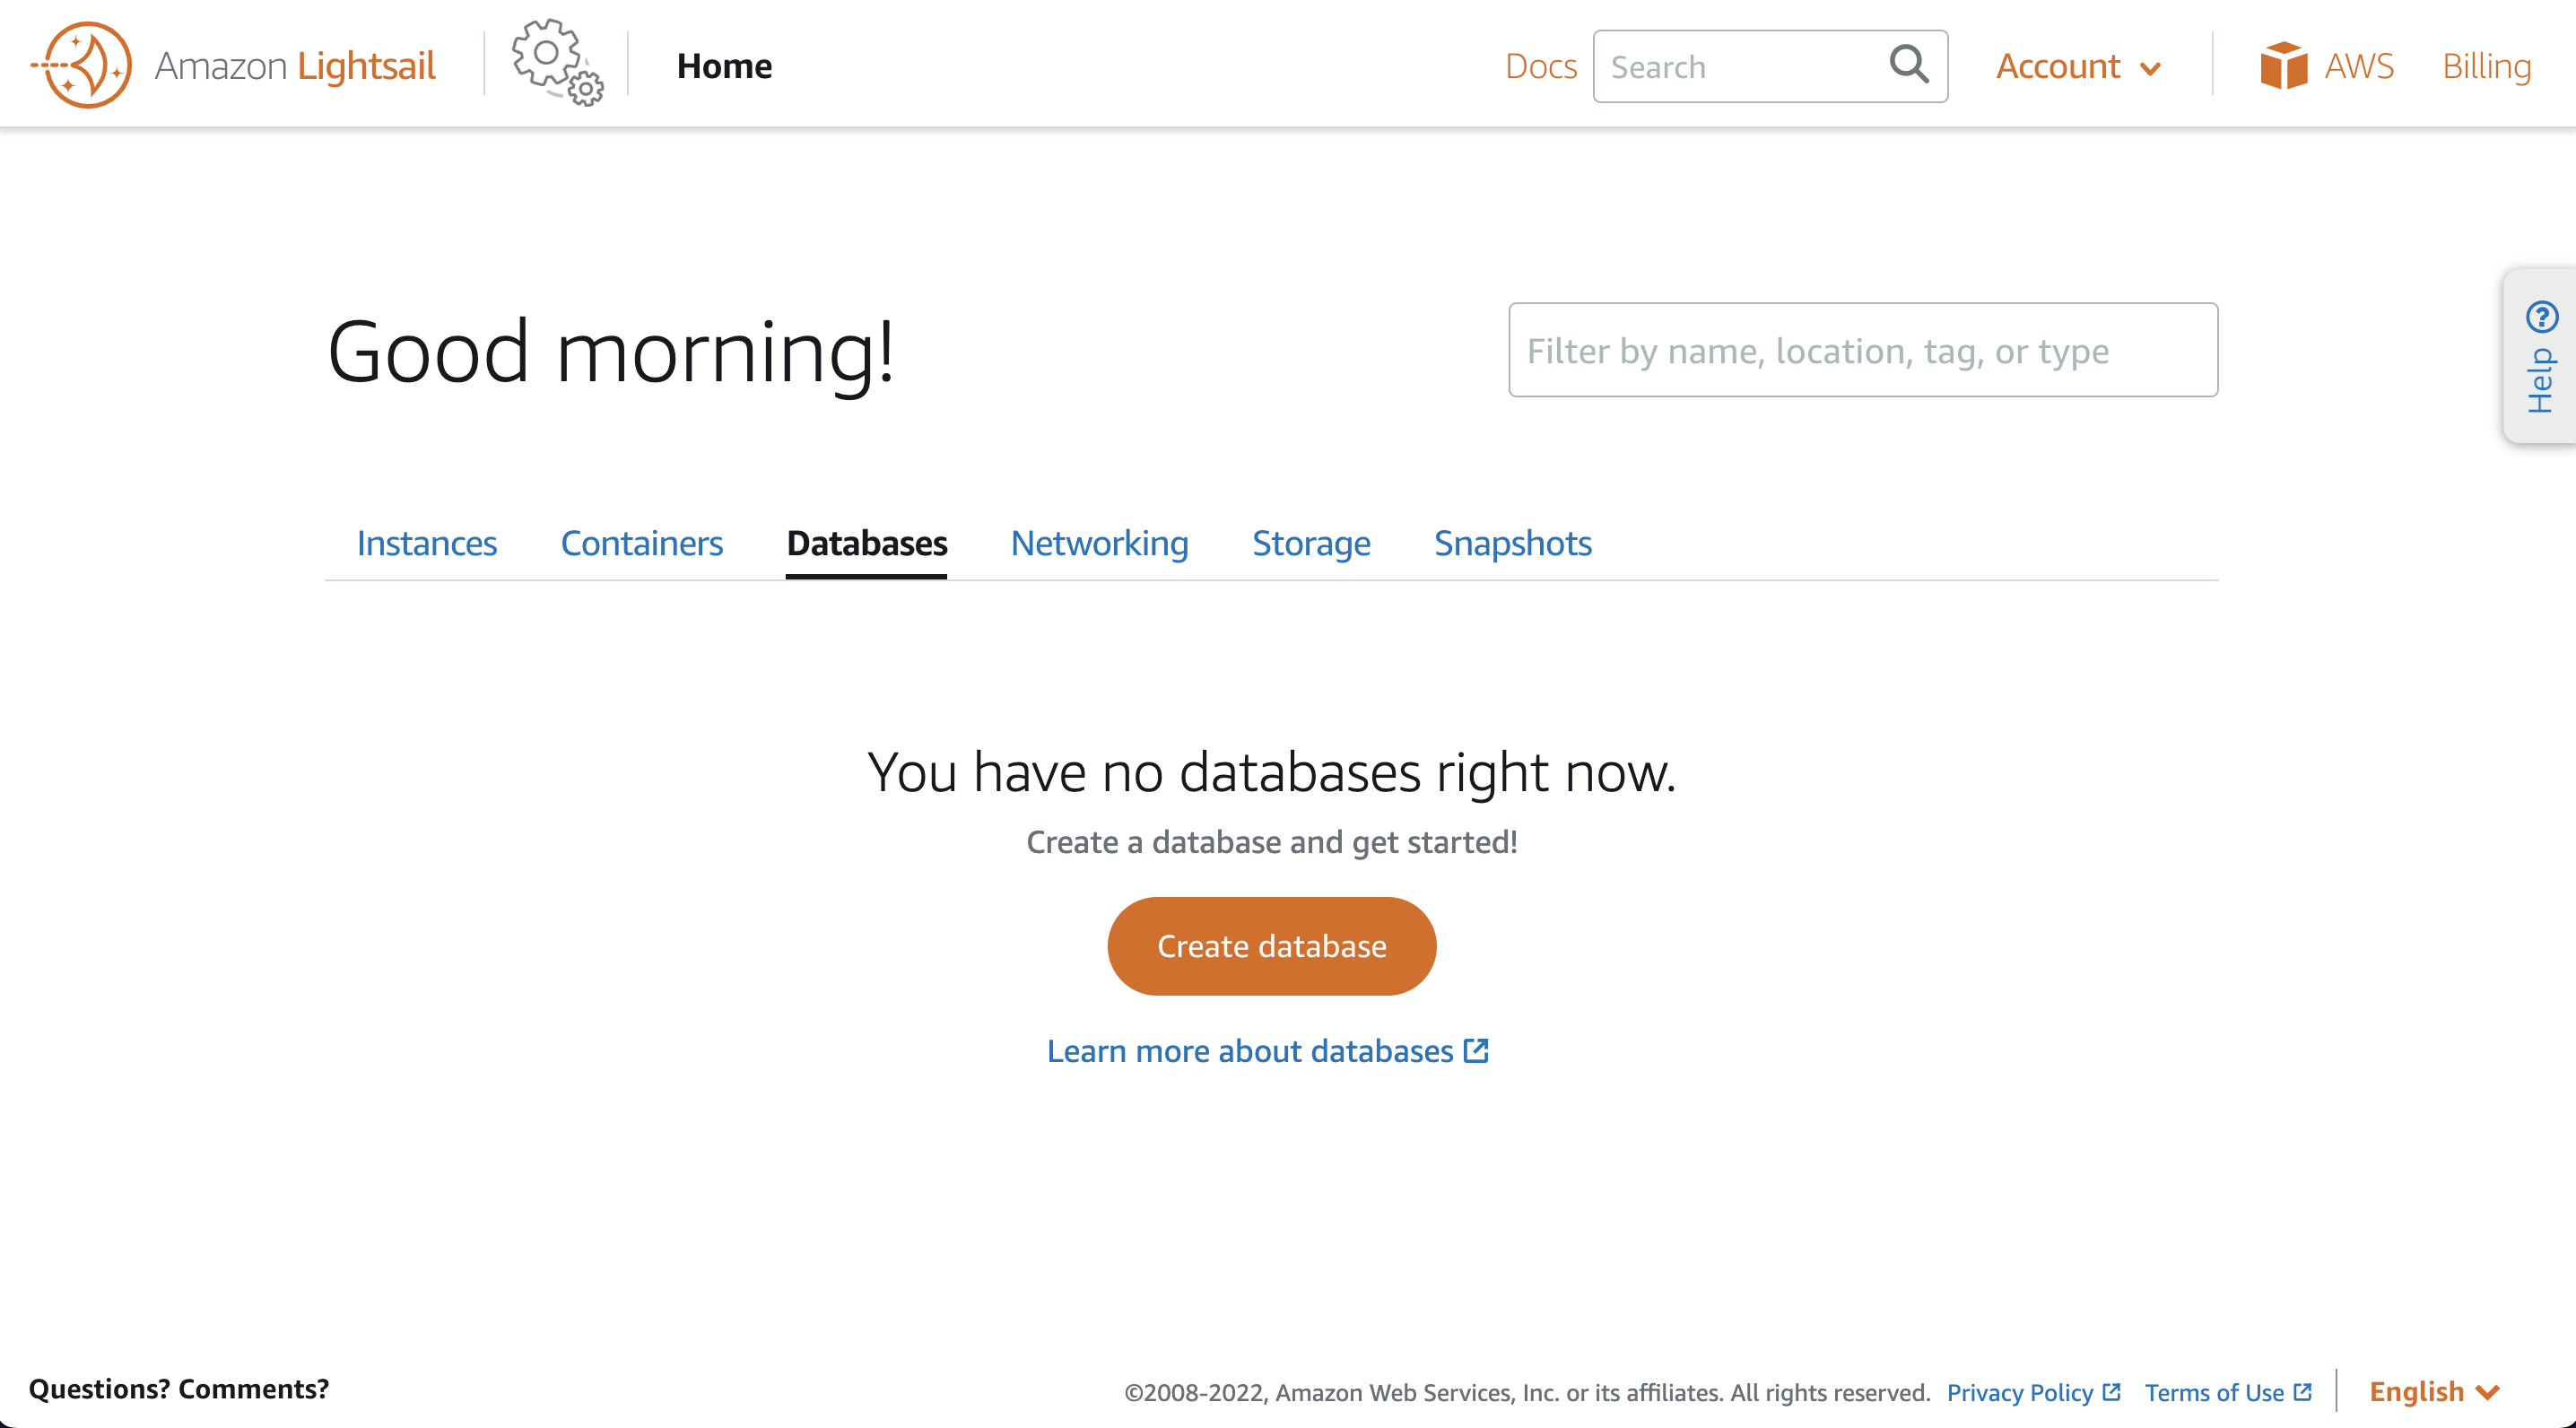
- Take some time to get familiar with the Lightsail control panel. When you’re ready, click on the Databases tab, and then click on Create database.
-
We will use the default MySQL version. Scroll down and click on Specify login credentials.
-
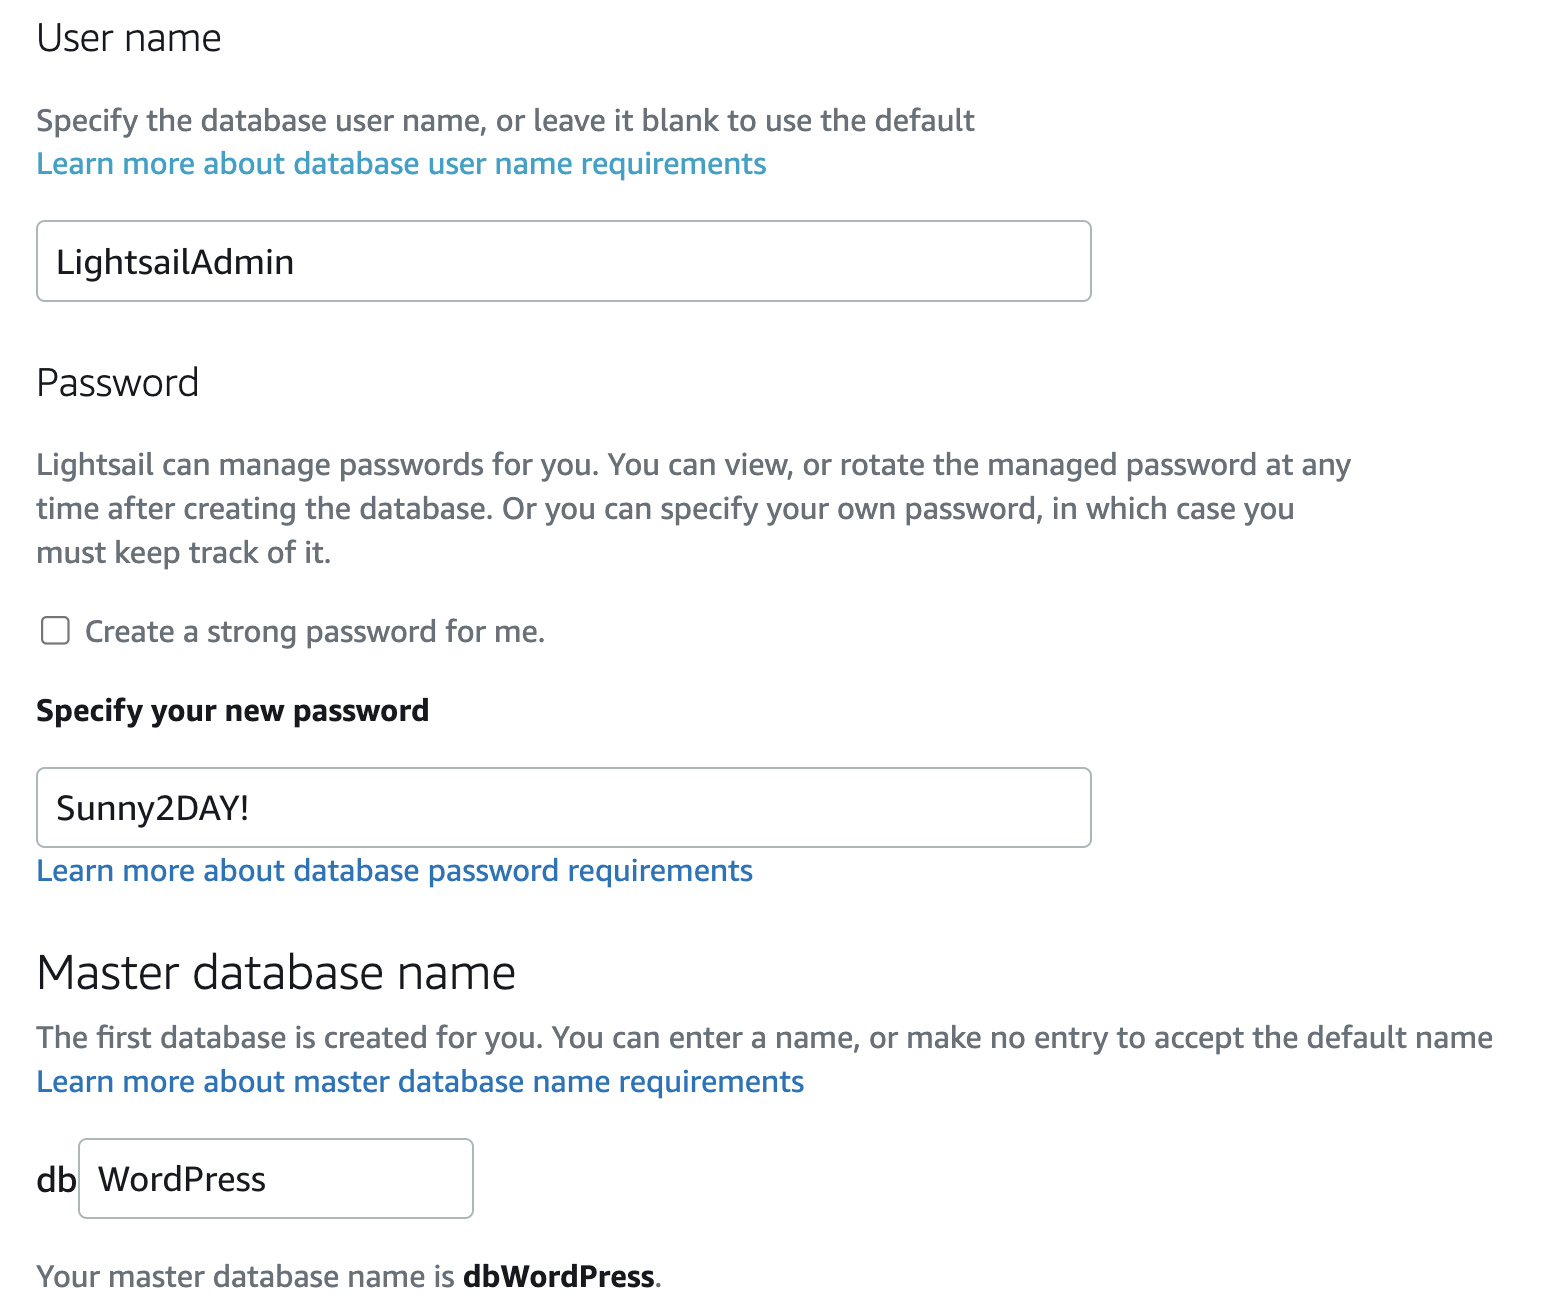
For the User name field, type ‘LightsailAdmin’ (note the capitalization).
-
Uncheck the option Create a strong password for me and enter ‘Sunny2DAY!’ as your new password.
-
For the “Master database name” field, type ‘WordPress’ (again, pay attention to capitalization).
-
- Choose a database plan.
-
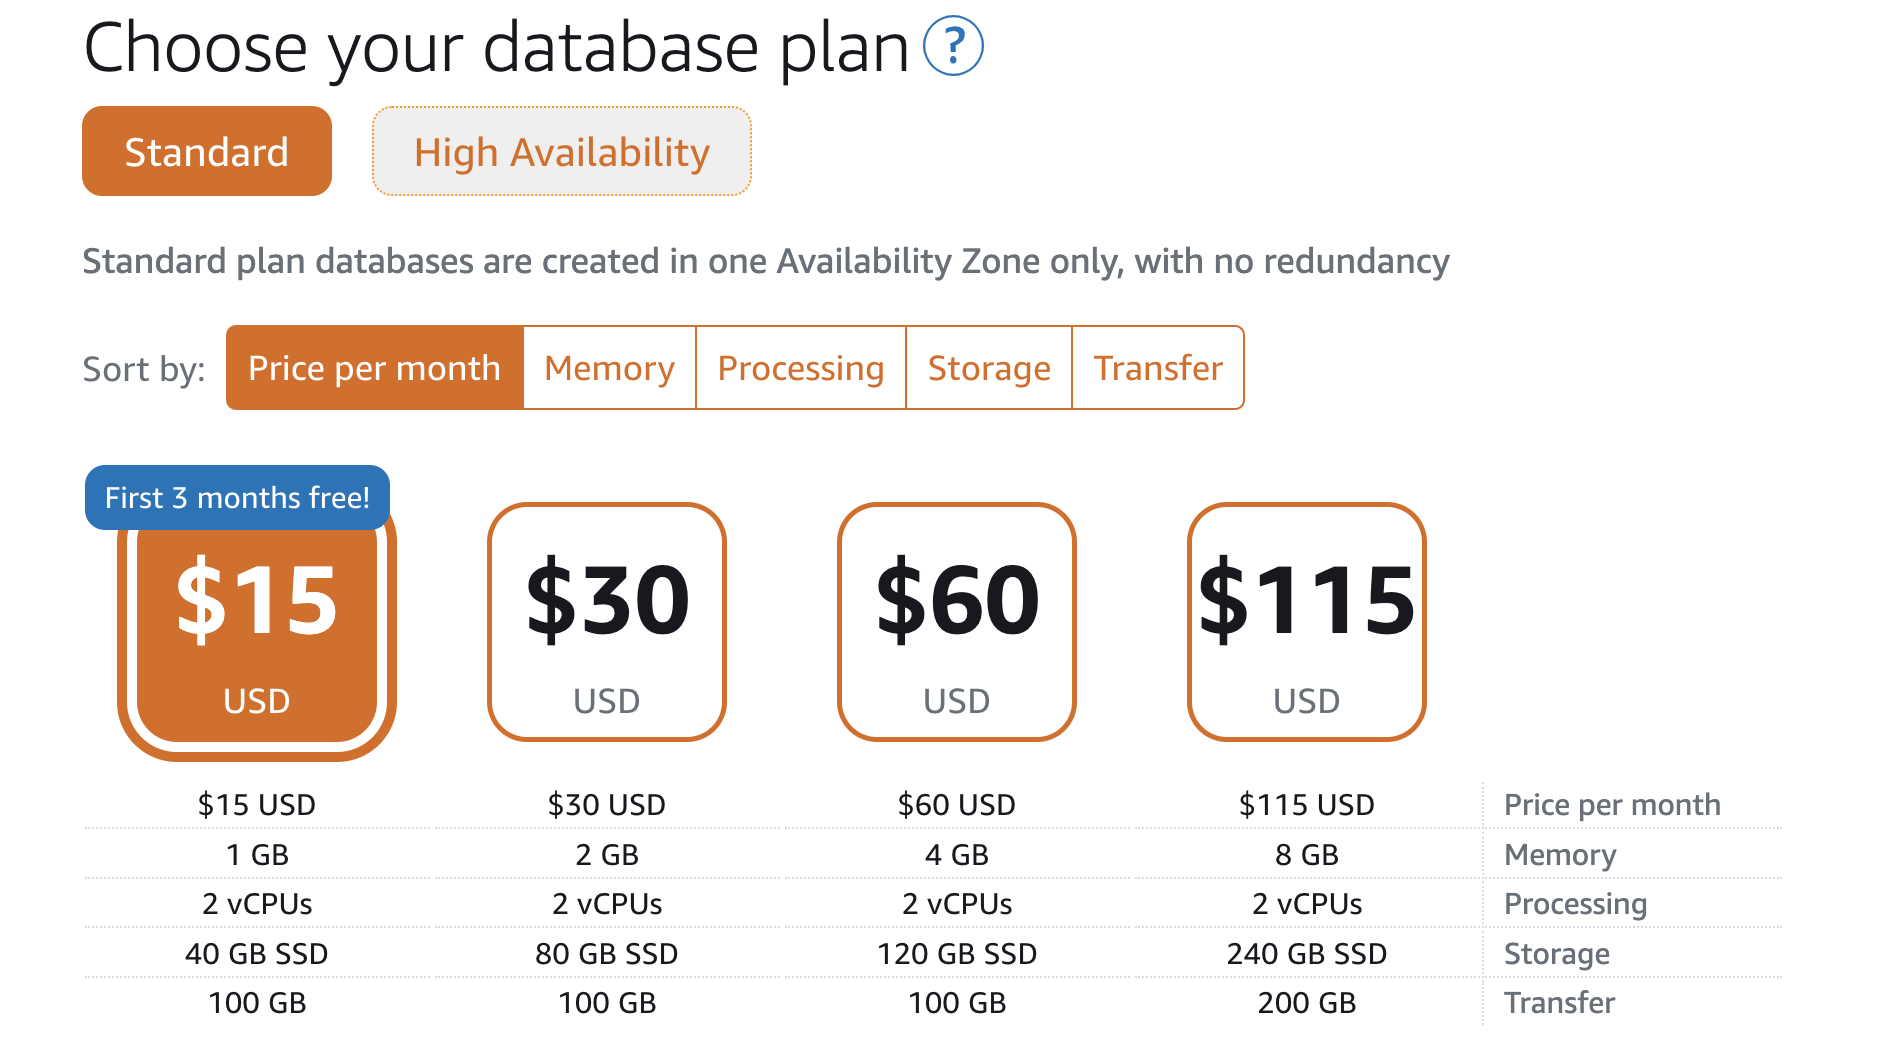
We will select a STANDARD database plan to save time and money. If you want to use the ‘High-Availability’ database, it will automatically switch in case of issues with the primary database.
- Choose the $15 database plan with 1GB of memory and 2 vCPUs.
-
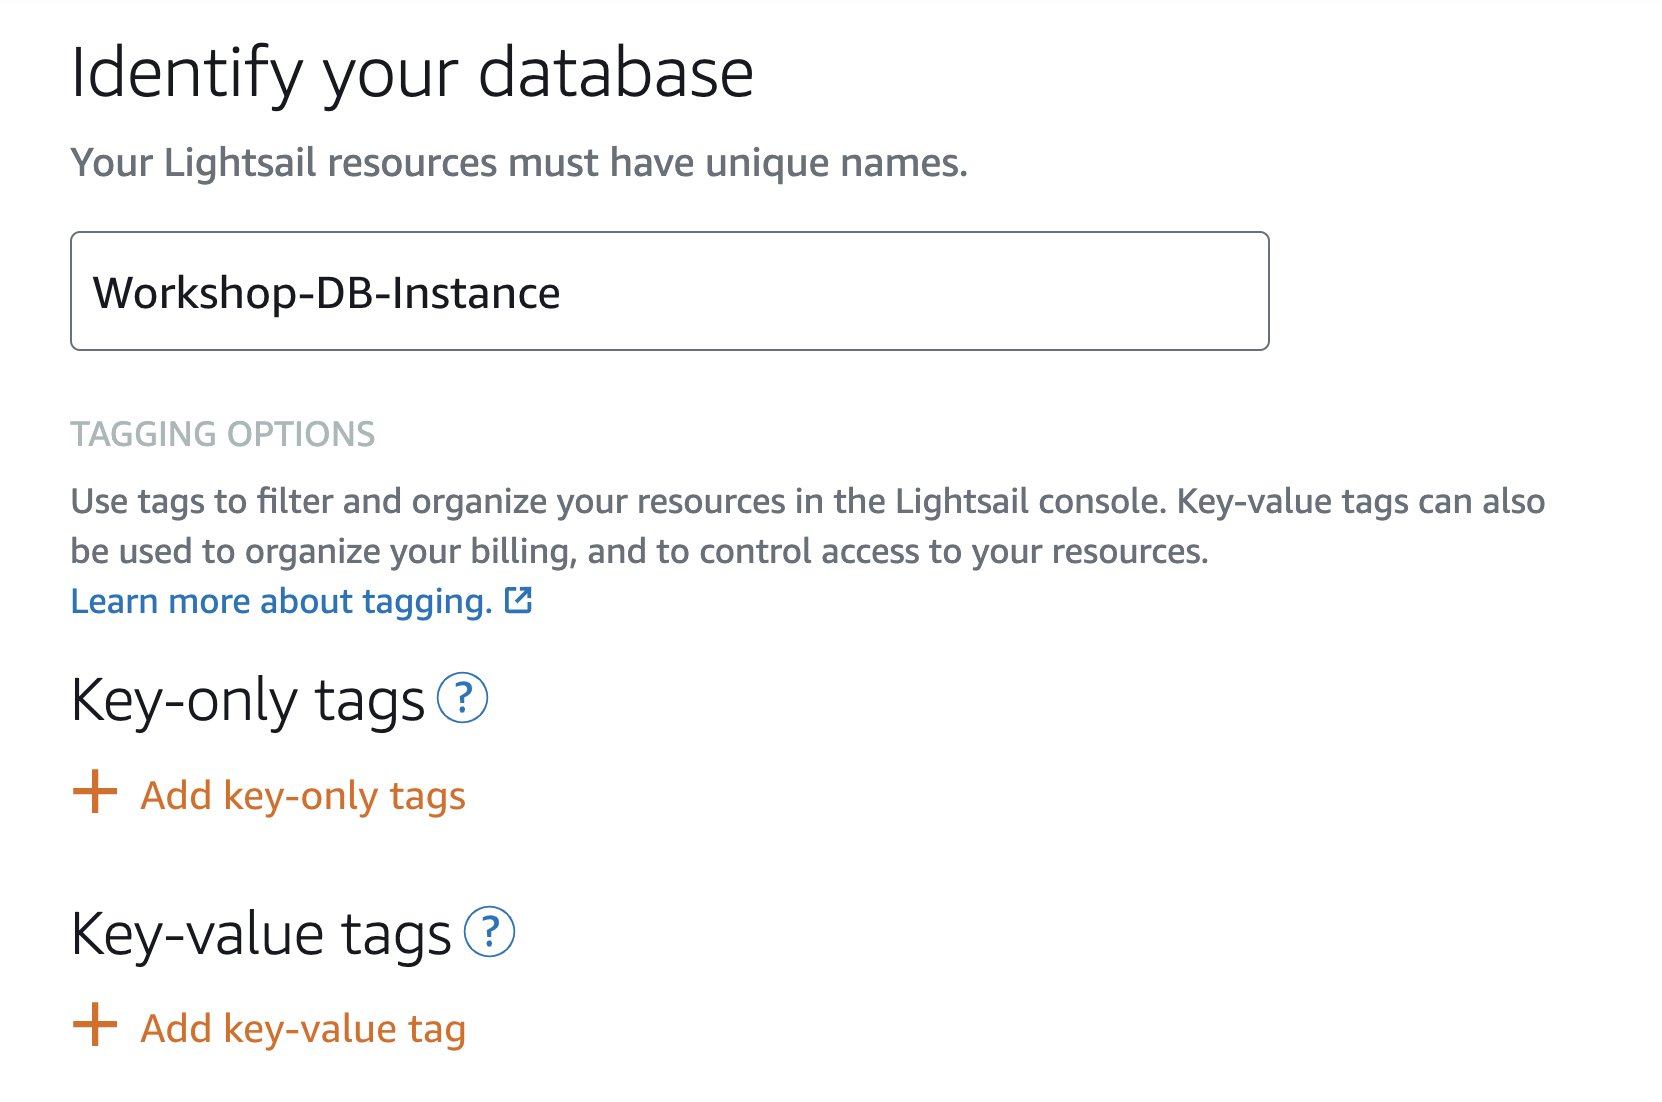
We need to give our database resource/object a specific name. In this case, this resource will run multiple databases, so we will also add identifying tags.
- Name the database object ‘Workshop-DB-Instance’.
-
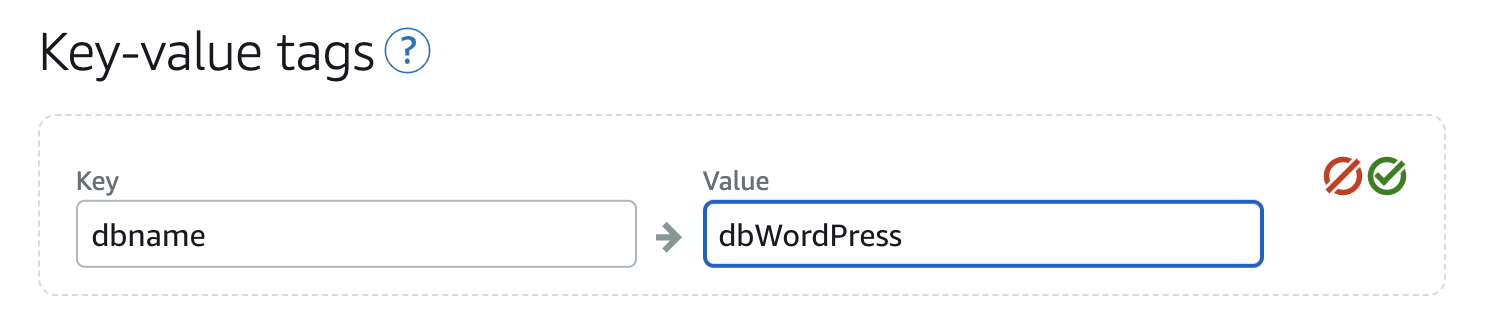
Since we can’t see the name of the databases running inside the database instance without logging into that instance, we’ll add a tag with the database name. Although we typed ‘WordPress’ for the database name, Lightsail adds a ‘db’ prefix, so the database we’re creating is actually ‘dbWordPress’.
Under ‘Key-value tags,’ click on Add key-value tag and add:
Key = dbname
Value = dbWordPress
- Select Create database.
- It will take about 15 minutes to create the database.
- While we wait for the database to initialize, we will proceed to the next step ‘Deploy a WordPress Instance.’
- Right-click on Instances and select ‘Open in a new tab’ because we will need to come back to this page later to get the database instance Endpoint URL.
We have completed the first step in creating a remote database so that all our applications can use it. If there is an issue with the primary database instance, there will be a second instance running (hidden from you) to take over if needed, ensuring higher availability for the database profile.